


Concerning TV Paint.
- May 11, 2018
- 3 min read
over the course of the project, i have come to grasp TV paint a lot more than when i had started, and allthouhg i would certainly not call myself a master as of yet, i do feel a lot more in tune with the software and what i can do with it. for example, heres a few interesting things i picked up that really helped or were major obstacles as i went along
- keybinds
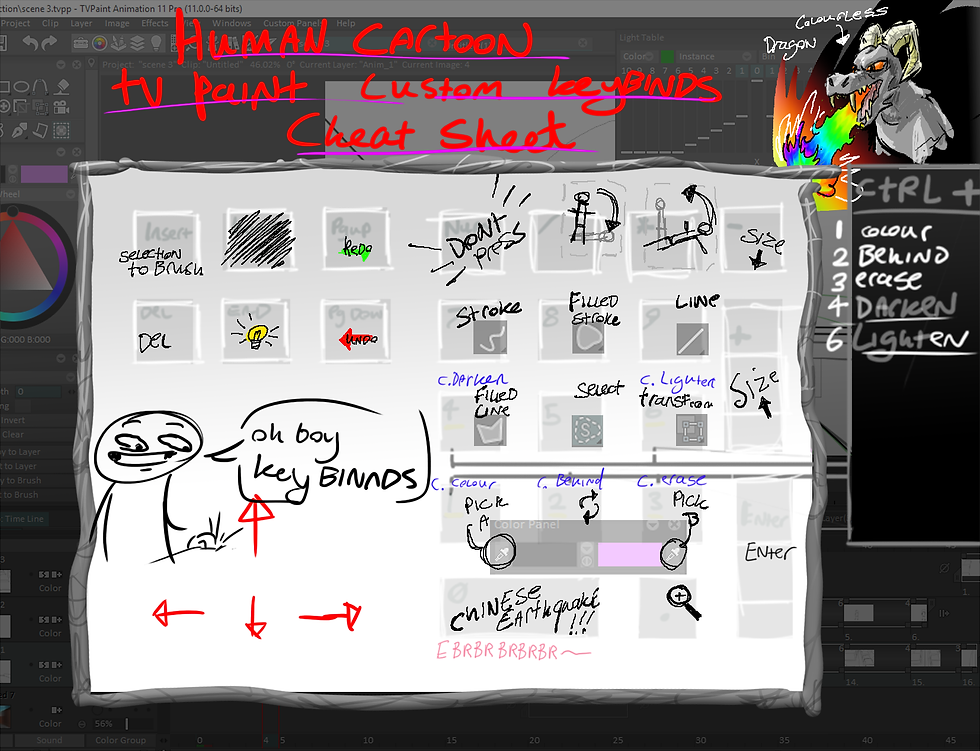
alright, so keybindings mate this process of animating a hell'uv a lot faster to get through. i mapped out all the tools that would be using to the keyboard so i could quickly switch between tools, or brush modes by holding ctrl to give you an example opf how much this actually cut down, i timed myself undoing then re-doing a brush stroke i mean i could hit the undo button on Tv paints interface but that can take around 17 seconds, whereas assigning the keys to "page up" and "page down" became a massive timesaver, aswell as a very handy tool for keeping my drawings "correct"
this is a skill i learned through playing world of warcraft way back in the day, but it was nice to be able to apply that logic to animating.
-managing the software-
whilst usign tv paint i found the importance of keeping your layers organised.
it's actualy very easy on the eyes to colour code the layers in regards to what those layers are related to.

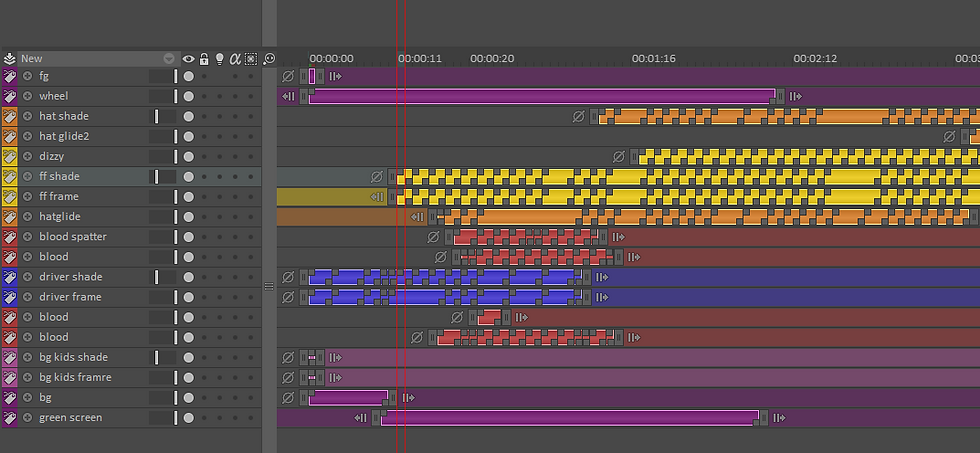
for example i would have all the layers for a specific character all labled one colour for ease of access. its a function that works somewhat similarily to the folder funtion in photoshop.
and plus it looks pretty
Interesting shots and a little about them

this scene i managed to recycle convincingly a few times, which was quite the releif because i really didnt want to animate this 3 times
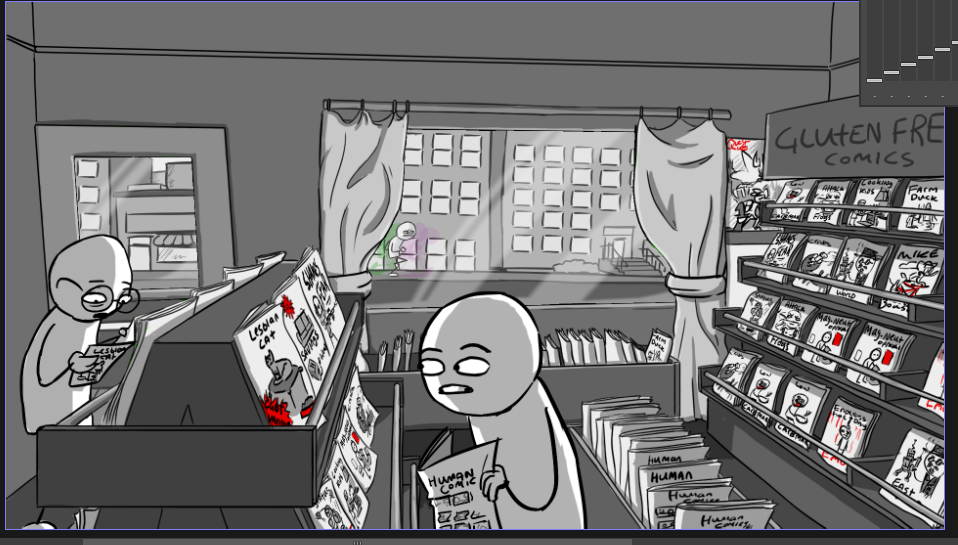
this comic book store is a perfect example of how i tried to accomplish visual humour with sight gags

originally i had planned to remove this scene from the film, however after giving it a little attempt to see how it looks in comparison this works so much better
it's a much more dynamic transition with the action and it was also quite fun to attempt to put to film.

to acomplish this i took several screenshots as i flew through the 3d mock up model of the scene, then i drew on the backgrounds and did inbetweens to smooth it out. as this is my first attempt at anything like this it does come off as quite rough and jittery. to help mitigate this i applied some effects over this scene.
-warp tool, and pals-
This is the pannel of my custom tools that i prepared together to make my film
on the top i have my brush, and also some line full tools. the brush i used for line obviously, however the others are a white fill polygon and the others are various shades darker. i used these two different shades to ad... yeah you guessed it, shade.
one i find would be better for when im doing my shade on a seperate layer (which is an option i took when the animation was fairly simple for that scene so i wouldnt have to keep my shade layer tight and within the line work
the other serves the same purpose, however it uses a "darken only" brush preset so it can add the shade in after the frame is drawn and onto that layer too so with that method i dont have to worry about the shade bleeding out of the figure that i want it to show on. which is a method that i would use when the animation had more movement as it was easier to add in shade like that.
bellow those tools i have a selection f the colours i have used for my backgrounds, along with other colours that i use too, such as the yellow for the bus or the police' cap badges. or red for blood and buttons,


ok, now this tool is really cool. i found as i understood what it did then i was finding usese for it all over the place (minus the example in that screenshot, that was a deleted scene that shall not see the light of day.)
anyway, i was using the warp tool to aid in getting inbertweens along with acomplishing easing in and easing out. or bending a head down in an otherwise flat and sterile walk animation


Comments